
Set up, Manage, Add Stream Targets, and Monitor Live Streams with Wowza Streaming Engine Manager

Description: In this tutorial, I’ll show you how to set up a live stream in Wowza Streaming Engine, how to manage and make changes to a stream, and monitor the live stream. You’ll all learn how to secure your stream, select formats, create a custom directory to record live streams, and how to create a stream target.
An introduction
As we getting started, you need to understand that all the power and functionality of using Wowza Streaming Engine happens through the use of applications. The streaming server is much easier to use and configure once you understand that. Whether you’d like to provide on-demand or live streaming for your viewers with Wowza, you’ll need to set up and use applications. In our case, we’ll be setting up a live streaming application.
Setting up a Live Stream in Wowza Streaming Engine Manager

The first step in setting up your live stream is creating an application that does live streaming. Within Wowza Streaming Engine Manager, navigate to the Application Tab
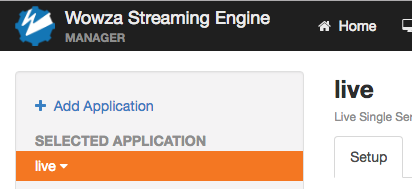
and choose + Add Application.
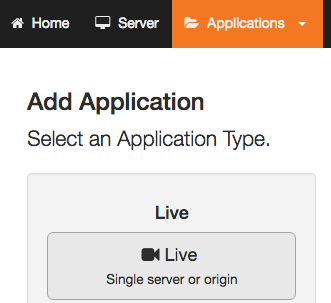
On the next screen that appears to Select an Application Type, click on the Live Single Server or Origin option.
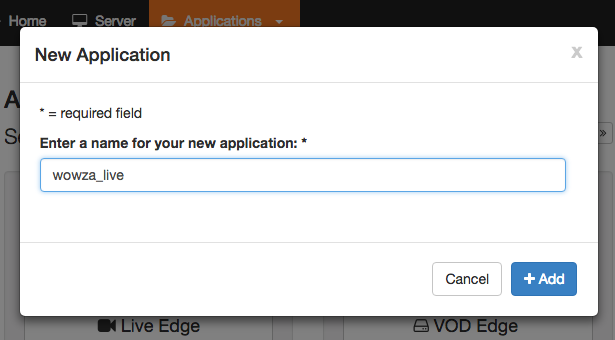
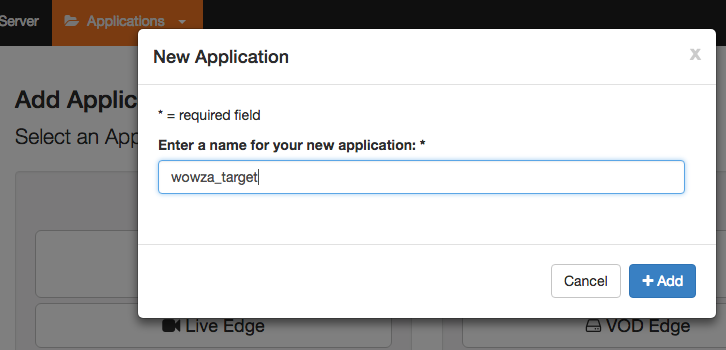
At the New Application dialog, input the name of the application. For this tutorial, I suggest using wowza_live. Once you input the application name in the text box, click the +Add button, and this will create the application.
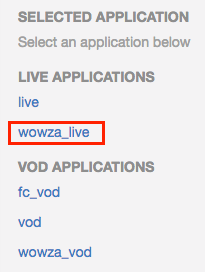
Your application can now be seen on the left side of the Wowza Streaming Engine Manager interface, under Live Applications.
Managing or Making Changes to Your Stream
Selecting Formats
Now, let’s make changes to your stream. Click once on the wowza_live application under Live Applications.
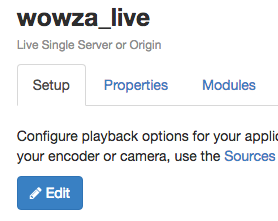
Select the Edit button under the Setup tab.
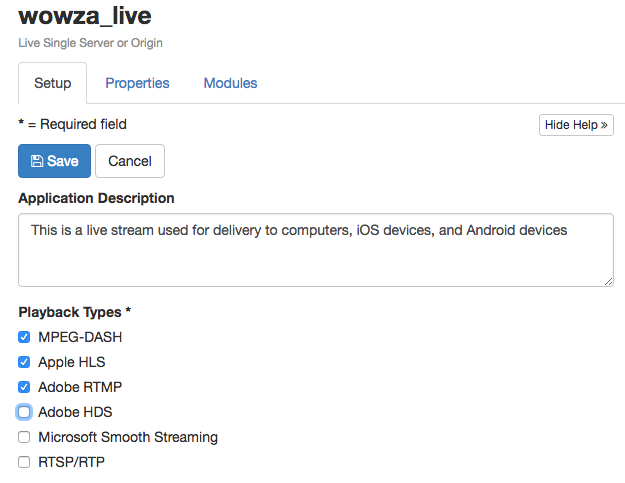
First, add a short summary for your stream in the text box where Application Description appears.
Second, under Setup deselect the following Playback Types: Adobe HDS, Microsoft Smooth Streaming and RTSP/RTP. Unless you’re using these playback types, it’s unnecessary to have them enabled. It’s likely that you will be using Adobe RTMP, Apple HLS, and MPEG-DASH for your streaming delivery. So, these should stay enabled. However, if you’re using one, leave it enabled.
Choosing to Record Live Streams

Third, let’s set up your live streams to record on the streaming server. Under the Options section, click the Record all incoming streams checkbox. Now, anytime you use this stream, it’ll be recorded on Wowza Streaming Engine.
Creating a Custom Directory
By default, this live streaming application uses the default media directory called “content” to store recorded videos. Let’s change that.
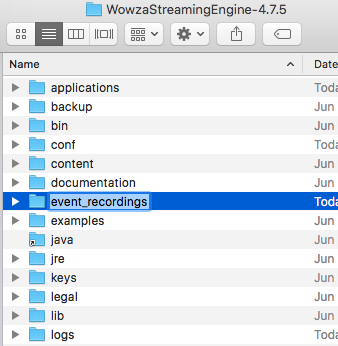
Navigate to the install directory for Wowza Streaming Engine, and create a folder parallel to the “content” folder called “event_recordings”. You’ll need to do this on the computer or server outside of Wowza Streaming Engine Manager.
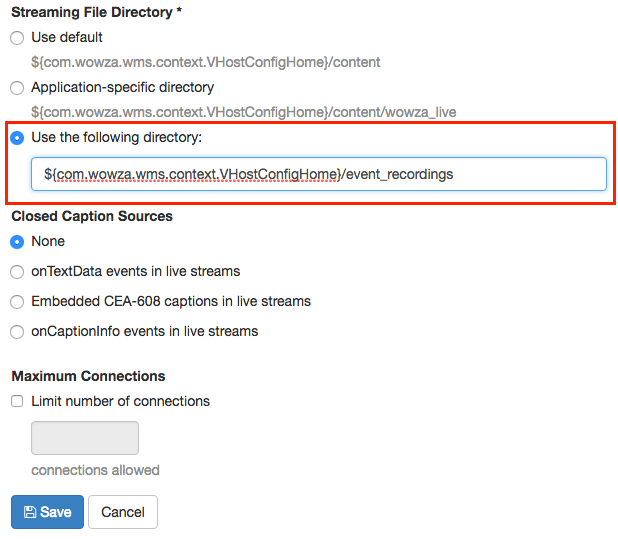
Next, under the Setup tab within your wowza_live application, select Use the following directory listed in the Streaming File Directory section.
Then, add “event_recordings” after the Configuration home directory listed here: ${com.wowza.wms.context.VHostConfigHome}/
It should look like this once you add your directory information:
${com.wowza.wms.context.VHostConfigHome}/event_recordings
Now, click the Save button. You’re live streaming application is now configured with your changes and recording will be saved to the custom “event_recordings” directory parallel to the content folder.
Setting up Security
When it comes to securing your source streams, two sections in Wowza Streaming Engine Manager are important, Source Security and Source Authentication. These items are important to ensuring that all users your designate can send live streams to Wowza Streaming Engine. Let me show you how to configure this.
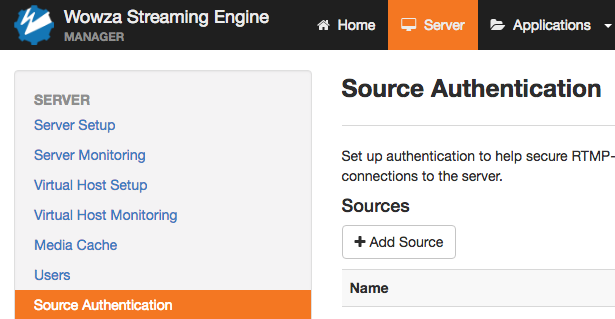
First, you need to add a user to the Source Authentication section under Server. Click the Server tab and Select Source Authentication under the options available. Second, click the Add Source button under Sources.
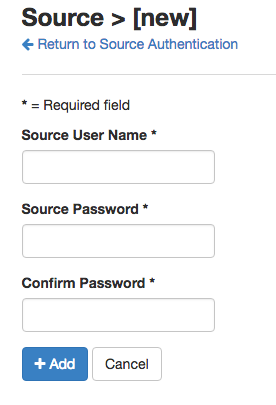
At the dialog, input a Source User Name, Source Password, and Confirm Password. Click the +Add button, and now you have a new user who can send live streams to your streaming server, Wowza Streaming Engine.
For the authentication to work, password authentication must be enabled on the live streaming application. In our case, the wowza_live application must require an authenticated user. By default, all live streaming applications have RTMP and RTSP authentication turned on, but let me show you how it’s enabled.
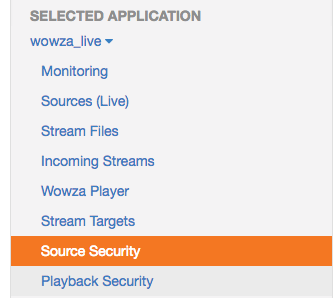
Under the Applications tab, find the live streaming application wowza_live and select Source Security.
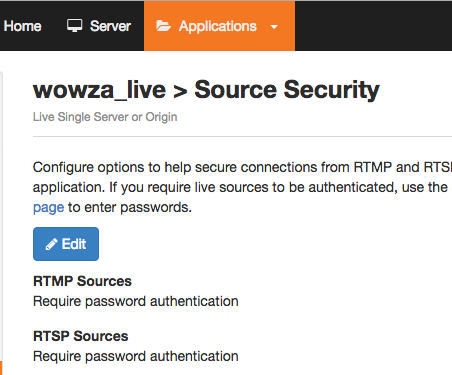
You can now see that RTMP and RTSP are enabled. If you’d like to make changes you can click the Edit button to disable or enable RTMP or RTSP authentication.
It always a good best practice when requiring authentication on your live streaming application to confirm that it works. You can do this easily by turning off authentication within Source Security and sending a test live stream to the application. Then, by enabling authentication again under Source Security and confirming that when enabled and without an authenticated user in your test stream, Wowza will not allow the live stream. In addition, with an authenticated user, you have to confirm that the live stream can be sent to Wowza Streaming Engine.
Adding A Stream Target
Now, let’s add a Stream Target that allows you to push your source stream to another server or CDN.
We’ll add the Stream Target on the wowza_live application we created, but we need another application to send the source stream to. For this tutorial, our other target application will be wowza_target. The wowza_live application will be where the live stream originates.
Navigate to the Applications tab and add an new application for live streaming. For the application type choose Live Single Server or Origin. At, the New Application dialog input wowza_target as you application name. Click the +Add button.
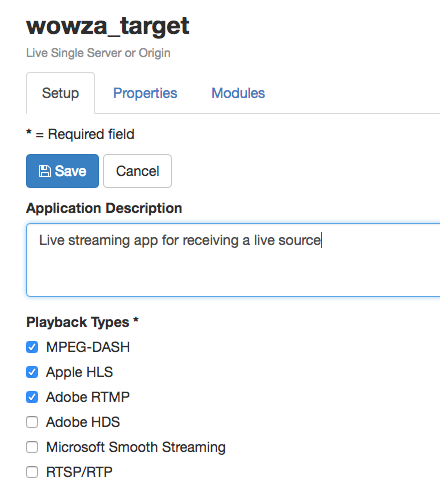
Select the wowza_target application under the available applications, and under Setup make sure that only MPEG-DASH, Apple HLS, and Adobe RTMP are enabled as Playback Types. Also, add the summary text listed above, and click the Save button.
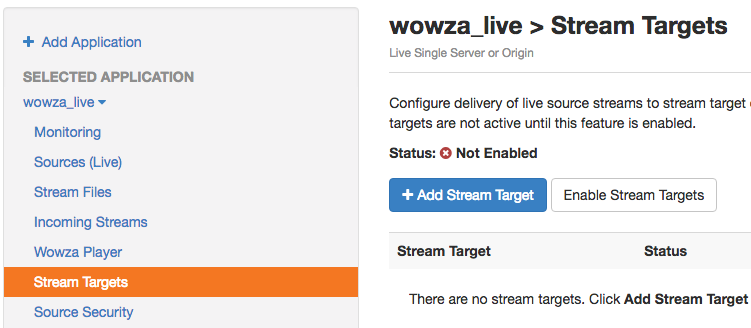
Next, we can move forward with adding our Stream Target. Under the Applications tab choose the wowza_live and select Stream Targets. Click the Add Stream Target button.

For this tutorial, we’ll be sending our source stream to a Wowza Streaming Engine destination. Choose Wowza Streaming Engine under Wowza Target Destinations.
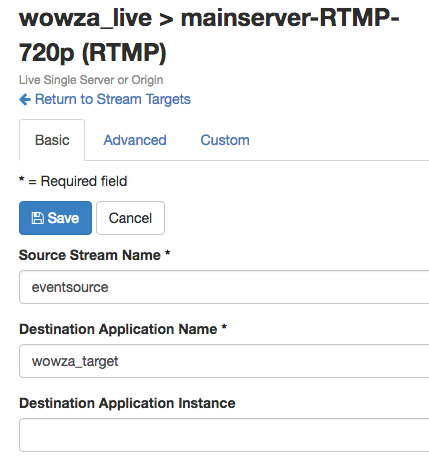
At the dialog, add eventsource as your Source Stream Name. This is the stream name that will be used from the wowza_live application. This can be whatever you’ d like. Input wowza_target as the Destination Application Name. This is the application created at the beginning of this section. Leave the Destination Application Instance blank. Wowza will come up with this for you. It’s the default instance for all applications.
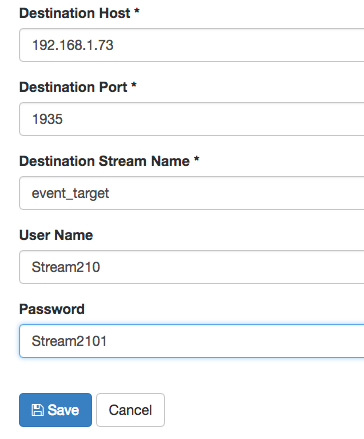
Now, add your Destination Host, Destination Port, Destination Stream Name, User Name, and Password. For the Destination Stream Name, this will be whatever Stream name you use on the Target application wowza_target. The User Name and Password would be the user created in the Security section of this blog post under Source Authentication. Click the Save button.
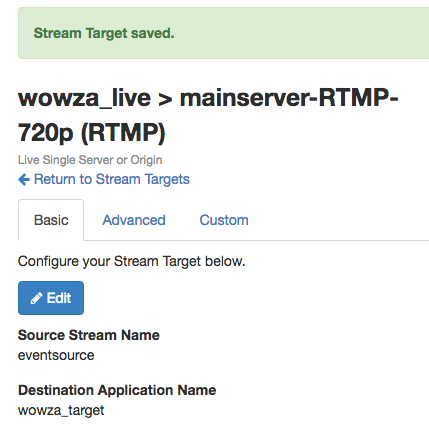
You should see feedback that your target is saved. Click the Return to Stream Targets link.
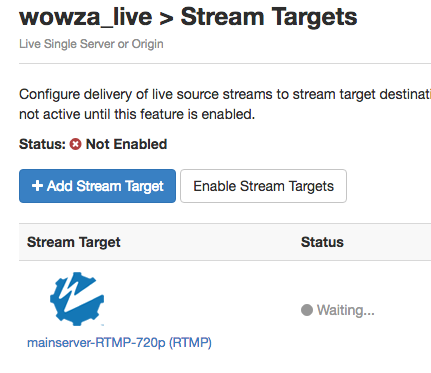
Click the Enable Stream Targets button.
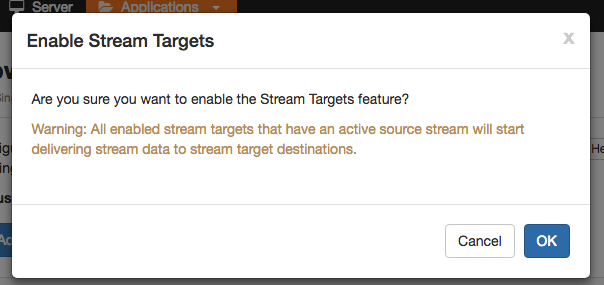
Click OK at the dialog.
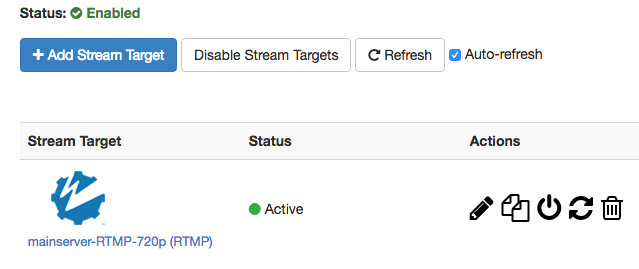
You should see feedback that you Stream Target is active.
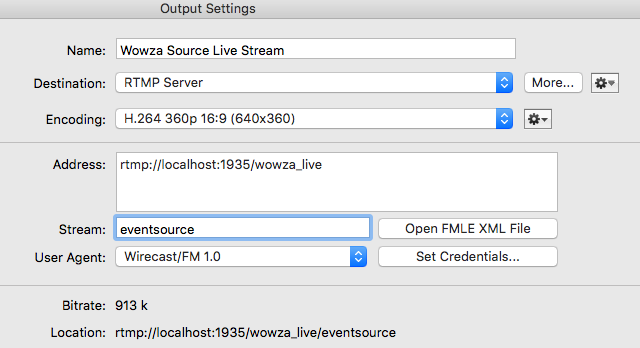
In your Live Encoder, you can input the the Address, Stream and Credentials. The key here is that you need to stream to the wowza_live application and use the stream name specified on your Stream Target under Source Stream Name. That would be eventsource.
The last important item on your Live Encoder is to input your credentials listed for your Stream Target.
Now, start your live stream on your Live Encoder. To test to make sure your Stream Target is working properly, you should be able to view a stream in the Test Player of Wowza Streaming Engine Manager for wowza_live and wowza_target. Remember to use what’s used in your Stream Target.
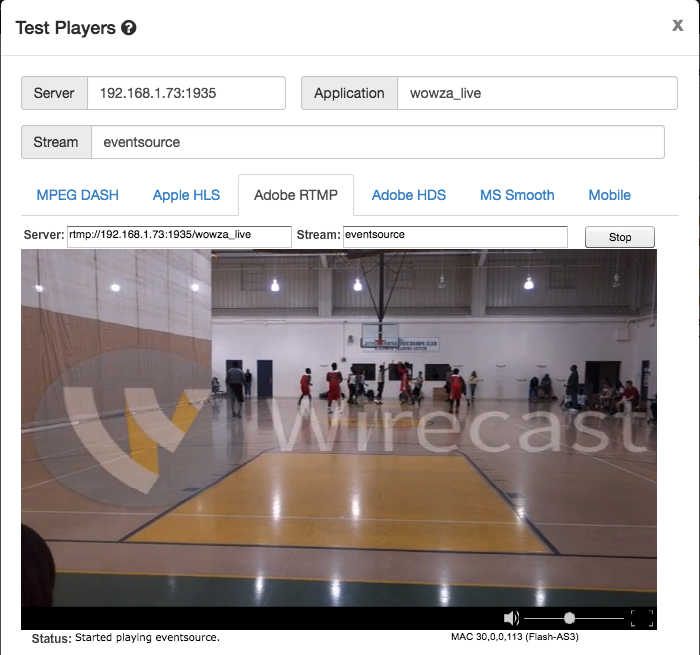
First, let’s test the source stream. Navigate to Applications and select the wowza_live application. Click on Test Players button and go to the Adobe RTMP tab. Input the Server information and Stream Name, similar to what’s above. Make sure you use your own Server Information. The application should automatically populate. Click the Start button to test the stream. Your live source should appear if it’s working correctly.
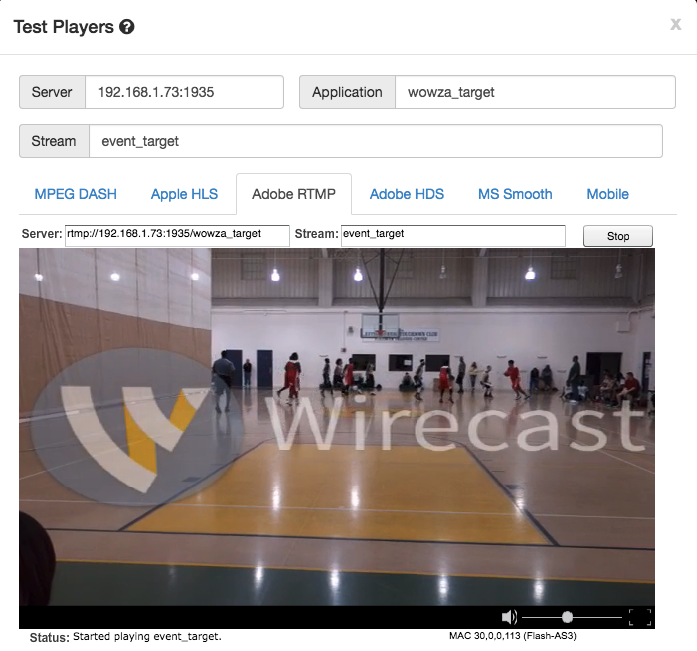
Second, repeat the same steps above using the wowza_target application. What you should input for the Test Player is listed above. If the live stream plays, the Stream Target is working properly.
Monitoring Your Live Stream
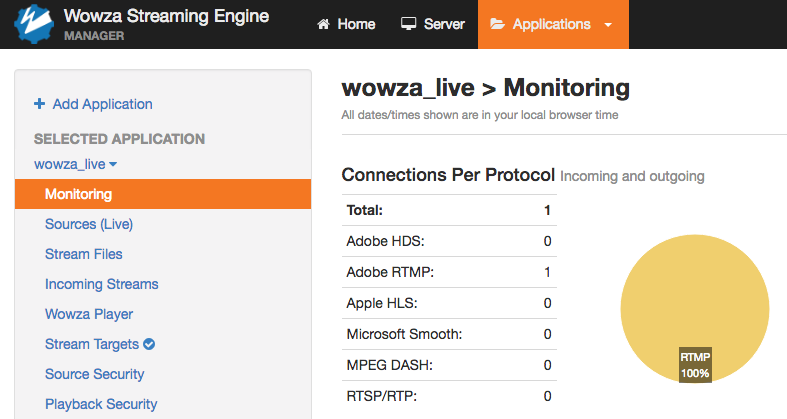
Next it’s time to move on to Monitoring your live streams in Wowza Streaming Engine Manager is straightforward. On the application you’d like to monitor, select Monitoring under the selected application. You’ll see the number of connections like the image above. You can see all of the incoming and and outgoing streams. In addition, you can see what streaming protocol is being. You can see all of the following: Adobe HDS, Adobe RTMP, Apple HLS, Microsoft Smooth Streaming, MPEG-DASH, and RTSP/RTP. Also, users can view what’s the most popular protocol for the live streaming application by looking at the percentage pie graph.
Insert Monitor_source_2.png
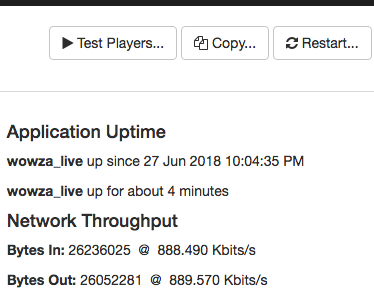
What’s also nice is that you can view how long the application has been running as was as the network throughput for your stream. These items are important to know, especially when you may be paying for your bandwidth usage.
Insert MonitorTarget_1.png
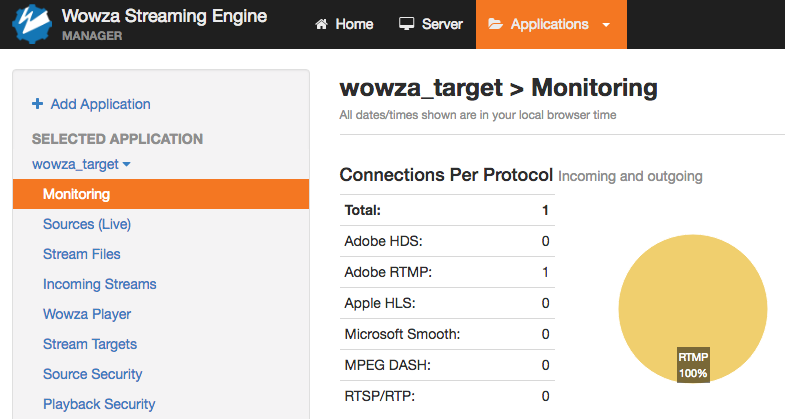
You can also monitor the incoming and and outgoing streams for the Stream Target Destination by viewing the Monitoring for the wowza_target application.
Items to Remember…
Even though you’re able to use the Wowza Streaming Engine Manager interface to configure streaming set-ups and other configurations, the changes and updates for Wowza Streaming Engine actually happen within xml files located within the Wowza install directory. The Wowza Streaming Engine Manager is simply a graphical user interface that makes this easier.
In the section above where we disabled various Playback Types, the benefit is it makes it easier to troubleshoot issues when you’re reviewing log files. If you enable formats you’re not using, all of the logging still occurs and makes it harder to identify problems.
When you create applications, it’s a good best practices to use all lowercase letters. This makes it easier when troubleshooting your playback and configuring your media player. Also, it’s wise to name your application according to what it does. This is why wowza_live is used. It’s a live streaming application. If this was an on-demand application, wowza_vod would be used.
When recording live streams, it’s a good best practice to choose different stream names for each live streaming event when you have reoccurring events using the sample stream name . For example, using a stream name of statehouse062818 works better than statehouse. The reason for this is the file name will change each time you record a live stream using the same stream name. For example, if you name your stream name is statehouse and you record the event on 5 separate occasions, your recorded file names will be as follows (in this order):
- statehouse.mp4
- statehouse_0.mp4
- statehouse_1.mp4
- statehouse_2.mp4
- statehouse_3.mp4
In this tutorial, we guided you through the process of how to set up, manage, and monitor your live streams with Wowza Streaming Engine Manager. We showed you how to manage and make changes to a stream, and monitor the live stream. You also know how to secure your stream, select formats, and create custom directories when recording your live stream, and how to create a stream target. If you’re interested in learning more about how to set-up, install, and configure Wowza Streaming Engine, attend our 1-Day Wowza Streaming Engine Training. Our training class is available on-line. You can call Freeman Compression at 407.797.5466 or e-mail us using the Contact Us form. Reach out to us about training times for other countries if you’re an international student. We also provide Wowza Streaming Engine consulting if you’re not interested in one of our trainings. We have Wowza consultants that can help you with your latest Wowza streaming projects.